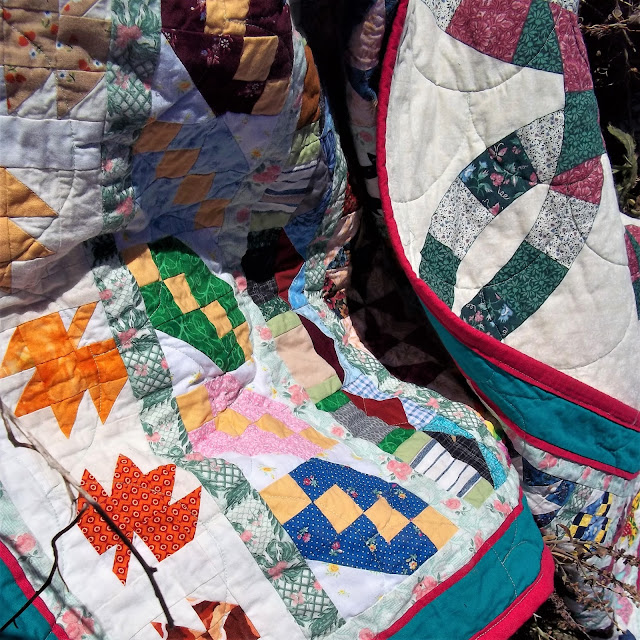
This post is a bitter-sweet... Here are the final instructions for the finishing of the Garden Row Quilt. When I was auditioning fabrics for the final border and binding, I tried a wide variety of options. This quilt with so many small blocks was so busy I had a difficult time finding anything that was acceptable to me... Until I tried the bold, bright solids. These are not a typical choice of mine, but when I placed them on the design wall my eyes (and mind) were pleased with the "calming effect" that they brought to the blocks. My eyes were no longer bouncing around, almost freaking out... I was greatly relieved to realize that I would not want to bury this quilt in the closet (or in the garden) because I couldn't stand to look at it.
I hope that you will be in love with your finished quilt as well. 😍
Cut: 14 horizontal sashing strips, 1-1/2" wide and 48-1/2" long.
2 vertical strips, 1-1/2" wide and 70-1/2" long (for side borders)
2 horizontal strips, 1-1/2" wide by 50-1/2" long (for top and bottom borders)
NOTE:: It is important to cut these sashing strips to this specific length to help in keeping the quilt as straight and "square" as possible. Because of the length of the rows and the varying sizes of the blocks (as well as the size of the pieces making up the blocks), you may notice that some rows will be a little more "springy" than others.
It is best to choose a fabric that is wider than the standard 42/44" width, to avoid having a seam in the strip (1 yard will be an ample amount of fabric). OR you can purchase 1-1/2 yards and cut the strips on the length of fabric, 1-1/2" x 48-1/2".
Mark the center of the sashing strip by folding in half and pressing a crease. Pin that center crease at the center of the row, pin each end of the strip to the ends of the row. Easing in, if necessary, pin into place the remainder of the block seams to the strip. The sashing strip will help to stabilize the rows and help keep everything lying flat when you are ready to sandwich the quilt.
Using the same fabric as you plan to use for the binding, cut 8 strips, 1" wide. Join the strips together, cut two strips to 70-1/2" long and two to 50-1/2" long. Press in half. Using a 1/8" seam sew these flange strips to the outer edges of the borders.
From border fabric, cut 8 strips 2-1/2" x WOF. Join two strips together to make four long strips. Trim two to 70-1/2" long. Sew borders to the sides of the quilt. Trim remaining two borders to 54-1/2" long. Sew to the top and bottom of the quilt. You are now ready to sandwich your quilt and quilt as desired.
I used a template to trace 5" clamshells onto my quilt. I found a tutorial that you may be interested in looking at by Kathy Kwylie. She suggests starting at the top or bottom of the quilt. I chose to start near the center of the quilt and work my way out in both directions. It is all a personal preference.
A hanging diamond design would be a good option as well... perhaps placed about 2" apart?
Binding: Cut 8 strips, 2-1/2" x WOF. Join strips together and press in half. You can find my tips, suggestions and a "tutorial" on a variety of binding options HERE.
The tea party in the garden has come to an end... I thank you for joining me for this sew along as I told the story of my grandparents, Tressie & Forrest Teegarden. It has been a good time! But before we say our final good-byes...
Won't you tell me if you had a favorite block or part of their story?
My favorite block to piece was the Hours block... And I love the Noon & Night blocks... you can never go wrong with a classic log cabin.
Least favorite??? No doubt that row of Wedding Ring Day! What a booger those were!
I have heard from several of you that this quilt has inspired you to start to document the lives of your loved ones. The "Priceless Conversations" document is a wonderful tool to assist you with this.
Thanks again for joining me! I will have a linky opportunity for you to share your finished quilt tops open until January 15th. At that time, I will do a drawing for a grand-prize drawing. The prize will include one final chance to win an assorted tea selection from Cornerstone Tea company as well as a pattern book and a teacup pincushion.
Let the quilt parade begin!
Keep Piecing,
Melva
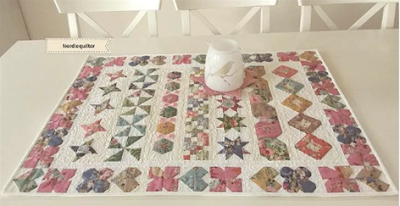
PS: If you made some of the blocks, but not enough to complete a quilt like mine you might get some ideas and inspiration from @cynwiestam_nordicquilter and her La Fleur quilt by Kitty Rose Cottage
Linking with:
Put Your Foot Down at True Blue Quilts
Free-Motion Mavericks at Quilting & Learning
Off The Wall Friday with Nina Marie
Brag About Your Beauties at From Bolt to Beauty
Peacock Party at Wendy’s Quilts and More
Friday Foto Fun at Powered by Quilting
Finished or Not Friday at Alycia Quilts
Scrap Happy Saturday at Super Scrappy
m


Melva, your quilt is gorgeous!! I wasn't able to keep up with this one, but I love how it turned out.
ReplyDelete
ReplyDeleteIt’s a lovely and fun quilt, Melva! I do agree with you on your choice of solids for the borders. They contain all the excitement. If you find it’s too busy for you, I’ll gladly take it off your hands. :D
Michelle
https://mybijoulifeonline.com
I have enjoyed this journey although I didn't make the quilt. It was so interesting to read all of your posts. Merry Christmas.
ReplyDeleteOh it turned out beautiful! I love the sashing - it just brings those pretty rows everything together so well. Your posts about Tressie and Forest were very entertaining.
ReplyDeleteMerry Christmas!
ReplyDeleteWishing you all the best in 2023.
Congratulations on finishing Pieces in the Garden. It looks like a fun project.
ReplyDeleteHi Melva, what a lovely project! I hope that you're having a Merry Christmas! Thanks for linking up to Free Motion Mavericks.
ReplyDeleteI really like the borders you chose - they help bring out the other colors. What a fun quilt a long !
ReplyDeleteThank you for the quilt along :-) Had some family stuff in my way since last summer, couldn’t find time play with fabrics…. But I think the blocks I have made could tell a good story~ from “bow tie” to “steps to altar”. Put them together and I love it ❤️
ReplyDeleteI hope that you will link up or send me a photo of what you made! I'd love to see it. <3 Melva
DeleteThis Karen ~ forgot to login to my account.
Delete